The Metaline Falls/CDA lower level staging is complete. With the track level 25 inches above the floor (seriously), the 4-track lower level staging yard is complete. This yard represents staging for Metaline Falls and Coeur D'Alene, both of which are accessed by leaving the UP mainline - in yard limits - at Dishman. As a refresher, the Metaline Falls train was a tri-weekly train operating up one day and back the next. This train will utilize two tracks in the staging yard - one for the inbound train, and one for the outbound train. The power and caboose will be fiddled between tracks to represent the out one day and back the next day nature of the train. In a similar manner, the other two tracks will be utilized by the Coeur D'Alene local, with one track for the inbound train, and one track for the outbound train. This train will also need to be fiddled between operating sessions, since I intend to operate a morning shift on one session and an afternoon shift the next. While Tony Koester of Model Railroad Planning magazine and has espoused you should always have twice as much staging as you think you need. I disagree in this instance, and this is the benefit of strictly adhering to a prototype; Milwaukee did not operate any other trains on this branchline, so I do not need more staging. And if for some unforeseen reason I would, the CDA local runs will run with fewer than 10 cars and can be doubled up on the same track since it will be fiddled between sessions. In sum, each operating session will see 2 train moves in and out of this lower level "branchline" staging yard.
Metaline Falls/CDA lower level staging specifics. The staging yard plywood base was built on a plywood base, built with a transition incline at the end so the track can transition to the 2+% grade of the helix. The track lengths for each of the staging tracks are about 15 feet long, which is sufficient for the "branchline" trains expected (the Metaline Falls train might be 20 cars, but at least half of the train will be 70 ton cement hoppers). The alignment of the tracks is away from the aisle side (the aisle is seen at left in the image below) since originally I had intended staging access to be from the Dishman side of the peninsula. I had to change that because Dishman benchwork had to be significantly lower to accomodate the underpass for Sprague Street as well as the fact the UP ROW is elevated a bit from the neighboring streets. I decided not to rip out all of the track and move it to the left since this really only will impact me and my fiddling of equipment between sessions.

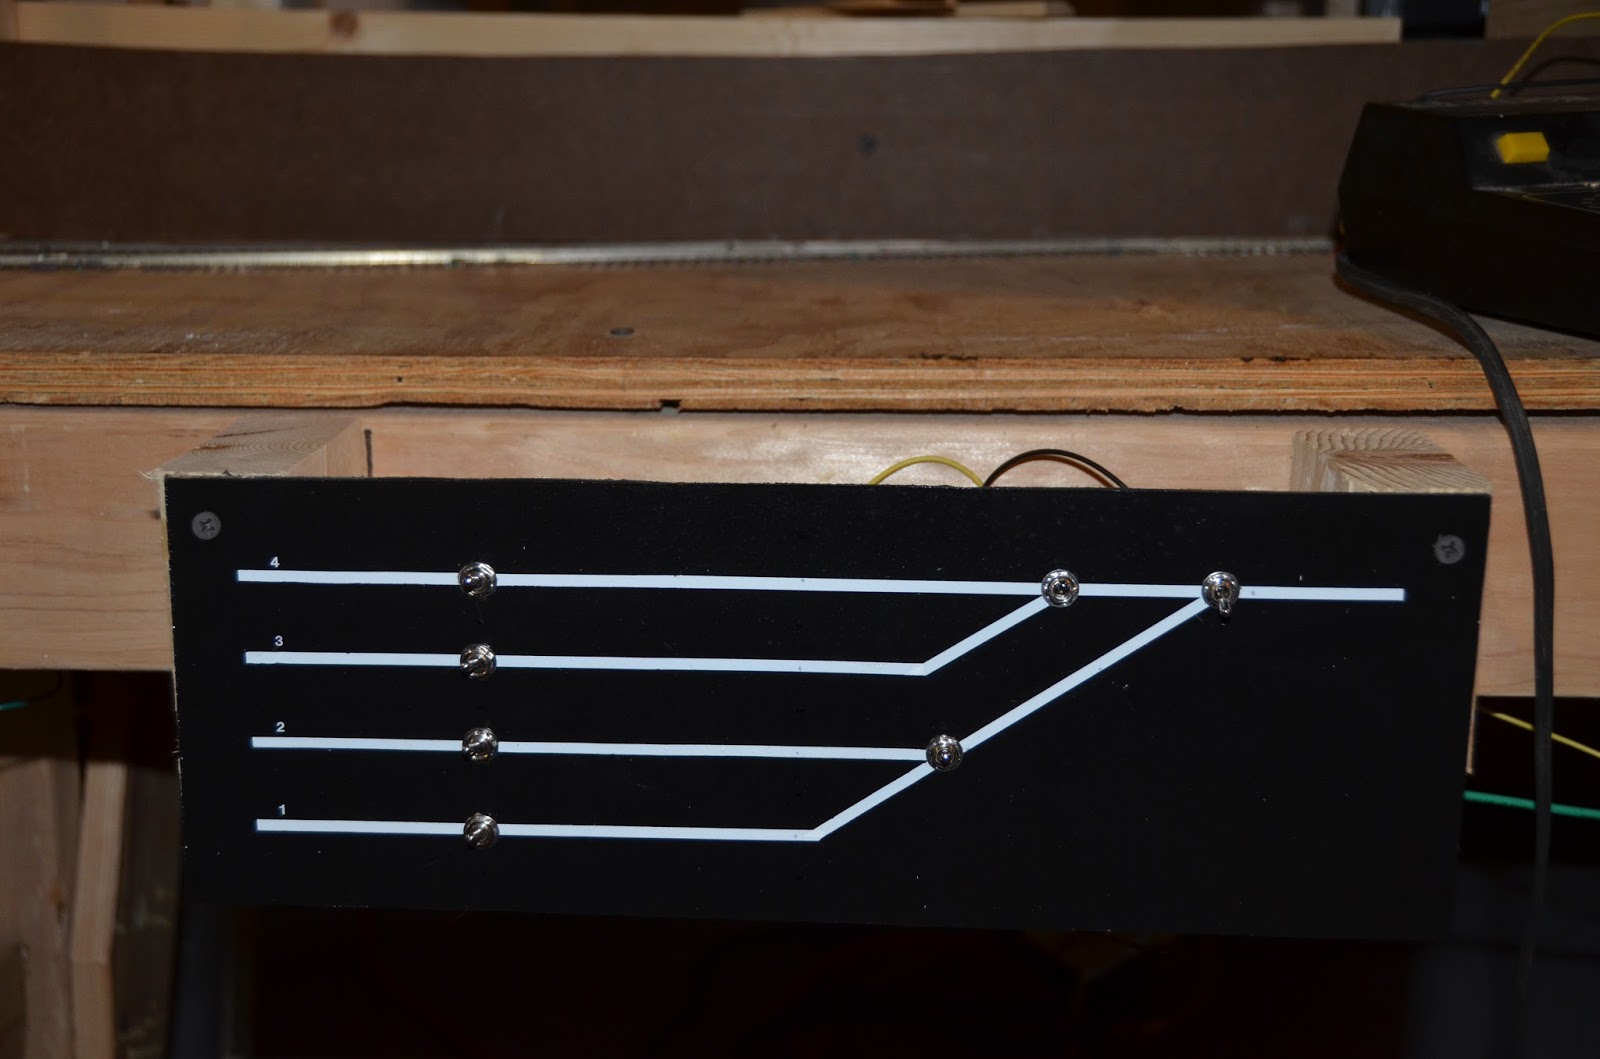
The three switches on the lead are powered up with tortoise switch motors, and are controlled from a panel that my son and I made together. Yes, that is a 1980's Tech 2 for power. Looking forward to upgrading to DCC!

The frogs are isolated and powered up with polarity reversing provided through the tortoises, The turnout points are powered as well. Additionally, every stick of rail in the staging yard has leads that attach to the bus, with all wiring complete and thoroughly tested. All of these steps are necessary for reliable and annoyance-free operations on any layout, especially one where there are SW1200s operating like this. Thanks to John Bauer and Matt Sugerman for pushing me to power the frogs. Honestly, I was scared to since I had never done it, but it was simple for an electronics neophyte (that's me).

The frogs are isolated and powered up with polarity reversing provided through the tortoises, The turnout points are powered as well. Additionally, every stick of rail in the staging yard has leads that attach to the bus, with all wiring complete and thoroughly tested. All of these steps are necessary for reliable and annoyance-free operations on any layout, especially one where there are SW1200s operating like this. Thanks to John Bauer and Matt Sugerman for pushing me to power the frogs. Honestly, I was scared to since I had never done it, but it was simple for an electronics neophyte (that's me).
The helix is rising. I should talk about this first, since I built the helix before the staging yard. The 30" radius curve helix has roughly 1.75 turns complete at this point, including cork roadbed and track that has been glued down. This has been good to test run equipment on, especially the long trailer flats that might have to traverse it and the resulting opportunity for vertical coupler bypasses. So far there are no uncoupling issues. The stackable method of construction using 5/8 inch plywood for 1/4 turns, with 3 and 3/8 inch tall 1X spacers, is working really well and I can envision building more helix down the road without issue. It's like stacking legos at this point. Here's a shot with my old BN coal train, my test train of long, short, and high cars, and some random power - including my son's Walthers F40PH. Stand-in power you could say....


The lower level benchwork is in. In 2014, I built about 50 feet of lower level benchwork from the helix to the hot water heater (again, reference this link for the plan), but not the Lake Street Spur since I am a bit space-challenged at this point and want to leave as much room as possible for storage and construction. Most of the completed benchwork is built tabletop style with 3/4 inch plywood installed on top since the Spokane industries and the yard have little elevation change other than track profile and mild water runoff. I will use roadbed to raise the track appropriate amounts from the tabletop. The Dishman scene is mostly built with risers however because that UP prototype alignment is on an embankment for most of that stretch of railroad. The exception is the Dishman wye scene, which I built from a large Y-shaped piece of plywood so that it could bend properly with the transition in and out of the helix.

The Dishman wye scene is temporarily laid out. I have taken some Atlas flextrack and tacked the track in place to see how the Dishman wye scene lays out. You can see it here. The 2x4 represents the footprint of the UP Dishman depot.

I have decided on roadbed. Thanks to my friend Matt Sugerman who recommended going with thin 1/4 inch luan plywood for roadbed, based on some of his experiences at other layouts. It is sandable and you can handlay track into it with ease. I think I would have used some of the commercial homosote roadbed from the gentleman in Washington state (name escapes me but not California Roadbed), but I had already bought the luan before I knew about him as a reliable source. I have cut an entire sheet of luan at this point, and I have kerfed it with a simple jig I constructed, so I am ready to lay roadbed. I will report back on this once I start Dishman. Again, the helix has cork roadbed.
What's next for 2016? Here are the things I am working toward in 2016. The big picture plan is to lay all of the track on the lower level as soon as possible so that I have industries to switch and a yard to operate as soon as possible. That should get the juices flowing to hold operating sessions. I am not sure I can finish that this year, but here's how to get there:
- The lights need to be wired. In 2015 I installed quite a few T8 light fixtures but they need to be wired by a pro. These lights are in the ceiling and will eventually light the upper level, but since I have not constructed upper level benchwork yet they will light the lower level. Provisions have been made for lighting leads though so the lower level lights can be easily wired in the future, attached to the underside of the upper level.
- Finish Dishman subroadbed and begin laying track. The Dishman track risers are installed above the open grid benchwork but the subroadbed has not been constructed yet. One minor hangup is that I need to engineer the Sprague Street rail overpass, and even though the 2 track UP bridge is a ballast deck bridge, I do not want the 3/4 inch plywood to carry over it since it will be visible from a side profile. I think I have a plan with thinner plywood. I also want to begin laying track, and this will include some handlaid turnouts since there is a need for some wonky curved turnouts. I also will try to figure out how to rebuild commercial turnout throwbars so they look better.
- Install DCC. I intend to purchase and install a DCC system - NCE.
- Finish switch engines. The big push will be the three ProtoWalthers MILW SW1200s needed for the yard, industry switching, and CDA local. Numbers 627, 630, and 645. I have outside help getting them ready with light, sound, and detailing. I will weather them. Here's a Dan Holbrook shot of all three of them 6 months after my modeling period.

- Continue with freight cars. I need to focus on freight cars that are needed for Spokane proper, and that is just about everything. At this point I don't have a firm plan, but have plenty of models staring me in the face, with a few started that I should finish. Here's one...

Thank you for reading, and I look forward to seeing what state the layout will be in a year...
No comments:
Post a Comment